

Hello everyone! Welcome back to another exciting installment of Exigo Insights. Today we’ll be discussing using a built-in Windows Server Feature that can help protect your file shares against all those harmful ransomware attacks out there. Let’s get started.
The face of malware has changed over recent years and it’s safe to say that it’s become an industry like any other. Your data, and it’s importance to you, has a value and it’s one that people are only to keen to capitalize on. With ransomware such as CryptoLocker and Locky, this is something that’s become all too easy.
In your organization you’ll have several tools in your arsenal which can be put to good use – mail filtering, gateway AV, web filtering, but one which you really should be making use of is the File Screening feature of your Windows servers. This allows you to build rulesets to report on, or block, files on your server.
The File Server Resource Manager role provides many features. File screening, in particular, can be used to help mitigate damage from a ransomware attack. With file screening, file servers can be configured to perform real time auditing on all shares for any files that become modified to any known ransomware extensions. In the event of a user getting infected with ransomware, the file screen will detect the modification of the files and deny that user access to the file shares, preventing them from damaging any other files. This can save hours of downtime and clean up.
I have provided a script that will set up and configure all of this within minutes. The script performs the following actions:
The script requires the following prerequisites:
To create the powershell script, copy the code from the link below into a notepad and save it as a .ps1 (for example, Install-FSRMRansomeware.ps1)
Running the script is really simple. I’ve created an advanced function that includes all the parameters necessary to set up the email alerts. All we need to do is edit the parameters for the function being called at the end of the script:
![]()
Once you have inserted your own parameters, save the script. To execute the script, hold down SHIFT and RIGHT CLICK on the .ps1 file. Select COPY AS PATH:

Open up an administrative powershell prompt, type in “powershell” and paste in the path we copied, press ENTER to run the script:

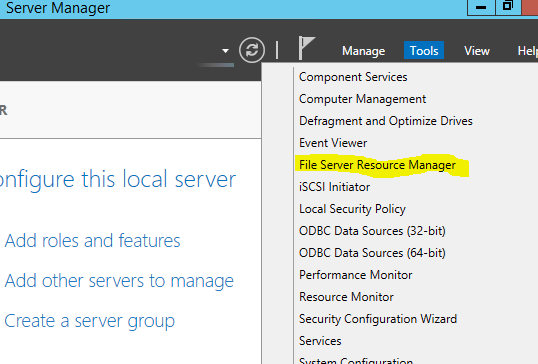
The script will start to run, if the File Server Resource Manager role is not installed it will begin installing.Once the script finishes, we can look at what was done by opening up Server Manager and clicking on Tools and then selecting File Server Resource Manager:
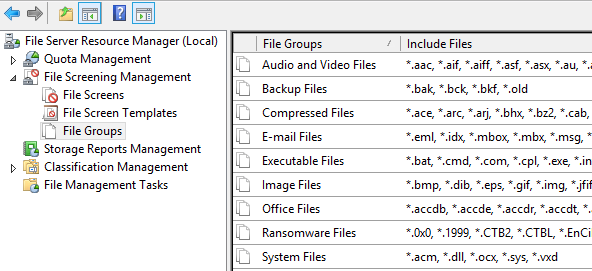
If we select the File Groups in the left window pane, we can see our newly created file group called “Ransomware files” that contains all of our known ransomware extensions to screen for:
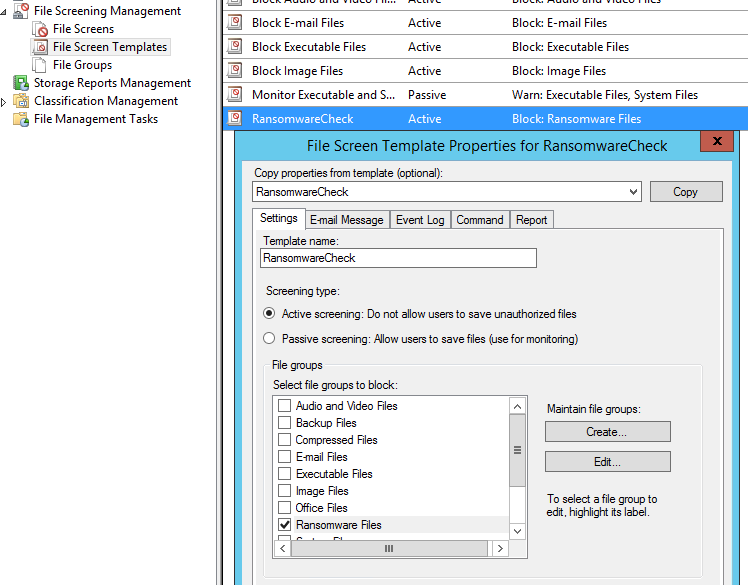
If we select File Screen Templates in the left window pane, we can see our “RansomwareCheck” template has been created. Right click and select Edit to look at the configurations. We can see that the Ransomeware Files file group is selected:
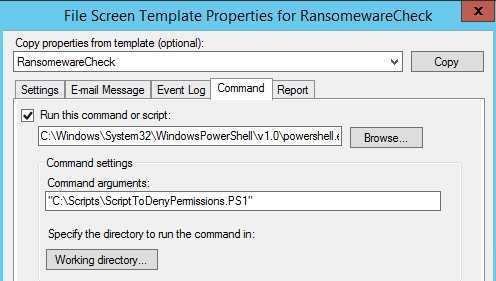
If we select the Command tab we can see that the script has been created in the C:\Scripts directory on the server. This is the script that performs the SMB blocking action and sends the alert email through the email relay server specified in the script parameters:
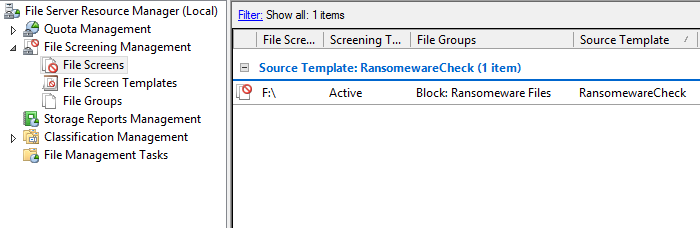
If we select the file screens section in the left window pane, we can see that there is an active file screen on our F drive. By default the script will scan for all available volumes besides the C drive and will create a file screen for that volume. This can be manually modified if desired:
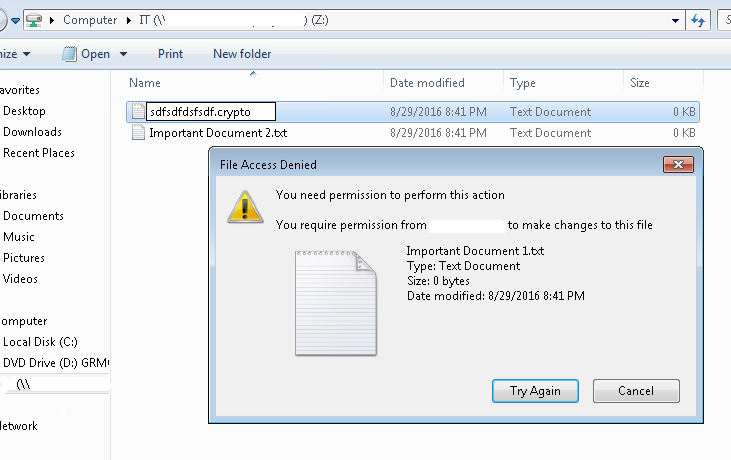
If we wanted to test this out, we can go to a workstation and browse out to a shared folder on the newly configured file server. We will mimic the extension change that occurs when a file is encrypted by the cryptolocker virus by renaming the extension of a file to “.crypto”. We can see that the change gets denied:
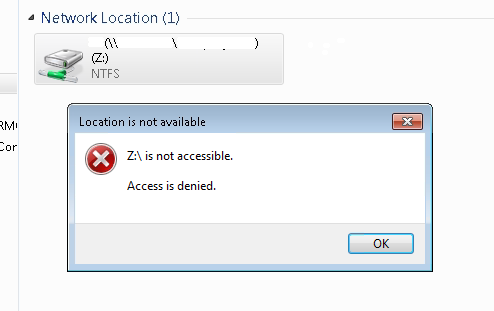
Also our user’s access to their mapped drive on the file server is now denied access:
An email is then sent to the email address that we configured in the scripts parameters. We get the information on the user that was infected and the server being attacked. We also get the command that can be run to enable access once again for the user:

If we paste in that command into an administrative powershell prompt on the infected file server, that user can now access their shared folders again:
![]()
You will want to do your due diligence on making sure the extensions being screened are kept up to date, you can easily edit the file group and add in the extensions at any time. Tripwire has been doing an amazing job at producing security awareness posts that include the most recently discovered ransomware flavors and the extensions they use. Check out their most recent post here. This is great way to protect your organizations data by mitigating the damage done during a ransomware attack. Also, it is free which makes it even better.


